The DIY Guide to Basic Window Replacement for Your Home

Replacing windows might seem like an intimidating task, but for handy homeowners, it’s often well within reach. With the right tools, a bit of know-how, and a clear plan, you can breathe new life into your home, boost energy efficiency, and upgrade your home’s appearance, without hiring out the job. This guide walks you through everything you need to know for basic window replacement, step by step. With these tips, you can tackle this DIY project with confidence.
We’ll begin by helping you determine when it’s time to take on this kind of work. From there, you’ll learn how to pick the right type of unit to suit your home’s needs and style. You’ll also get guidance on preparing the work area, taking precise measurements, and removing any outdated materials safely and effectively. These are foundational tasks that can make or break your results.
Whether you’re taking on one room or revamping the entire home, this comprehensive breakdown ensures you’re not alone in the process. With every section, we’ll build on your understanding, from the big picture down to the finer details. If you’re ready to roll up your sleeves and transform your space with a professional finish, this DIY guide will show you how, one step at a time.
1. Knowing When to Start

Understanding when it’s time to take on this type of project is the first and most crucial step. Many homeowners aren’t quite sure what signs to look for, especially if the frames still appear intact from a distance. But issues like drafts, condensation between panes, or difficulty opening and closing can indicate deeper problems. If your home’s energy bills have been creeping upward and your interiors feel less comfortable year-round, you might be due for a basic window upgrade.
More specific symptoms can also reveal when a window replacement is necessary. Warped frames, rotting sills, and visible cracks in the glass or sash aren’t just cosmetic issues. They impact structural integrity and energy efficiency. In older homes, materials like single-pane glass or outdated sealing methods fall far short of today’s performance standards. If you find yourself patching or caulking frequently, it might be time to replace the unit entirely instead of continuing with temporary fixes.
In many cases, addressing the issue sooner rather than later can save you money in the long run. New installations can offer improved insulation, noise reduction, and even UV protection. Whether you’re tackling a full house or starting with just one room, recognizing the right moment to make the shift sets the tone for a smooth and effective DIY project. With the proper plan in place, your basic window work can offer substantial and lasting improvements.
2. Choosing the Right Fit
Selecting the right unit goes beyond just picking one that looks good. Size, material, and energy efficiency all play important roles in ensuring the new installation serves its purpose for years to come. Homeowners have more options than ever, from traditional wooden frames to vinyl, fiberglass, and even composite alternatives. Each type has unique pros and cons that can impact both performance and aesthetics, so understanding your priorities is essential.
Some DIYers choose products from trusted names like Andersen Windows for their reputation in durability and design variety. These types of products often come with detailed installation instructions and customer support, which can be a major help during a self-managed project. Consider the climate in your area as well. Some materials handle extreme temperatures better than others. Features like double or triple glazing, gas-filled panes, or low-emissivity coatings can also influence your final decision.
Be sure to compare styles like casement, double-hung, or sliding units, depending on where they’ll be installed. For example, bedrooms often require easy egress options, while kitchens might benefit from more ventilation flexibility. Whether you want a modern look or something that blends seamlessly with a historic home, the right choice should balance visual appeal and practical functionality. With a carefully selected basic window, you’re setting yourself up for better performance and greater satisfaction in the long run.
3. Prepping the Opening
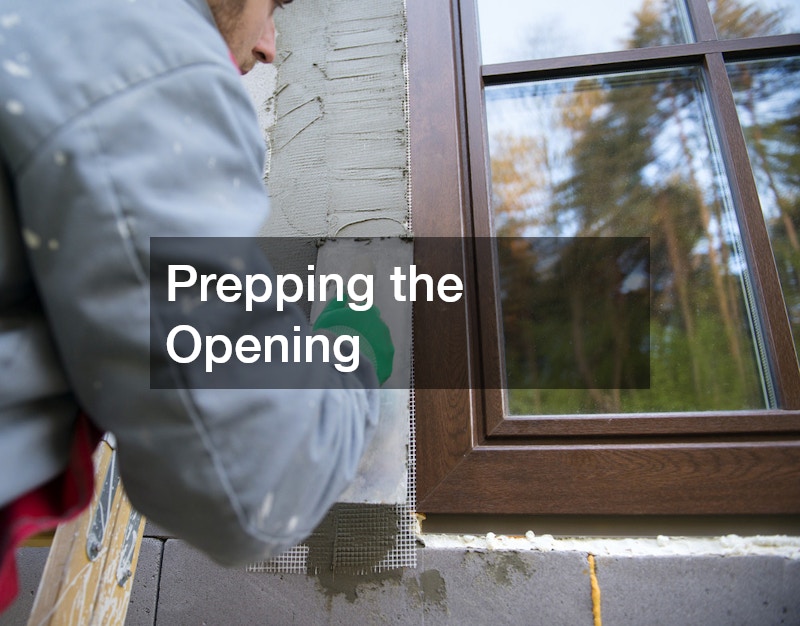
Once you’ve picked the right unit, it’s time to prepare the space for installation. Start by clearing the surrounding area, removing trim, and inspecting the frame for damage or signs of mold. Wear proper safety gear and take your time to prevent damage to nearby walls or finishes during this step.
While a general contractor might perform structural assessments, a handy homeowner can often do a visual check for rot, gaps, or uneven surfaces. Use a level to see if the opening is square, and inspect the sill for signs of water damage or warping. Any issues you find should be addressed before continuing, since they could affect the fit or function of the new unit.
Prepping also includes thoroughly cleaning the area and applying any necessary primers or treatments to prevent future damage. You might use foam insulation, flashing tape, or caulk in areas where gaps are likely. Once you’ve properly prepared your opening, you’ll find the installation process far smoother. With your basic window site prepped and ready, the next step is accurate measurement, arguably the most critical part of this DIY journey.
4. Measuring Like a Pro
One of the most essential parts of any installation is taking precise measurements. Even the most high-end unit won’t function properly if it doesn’t fit the opening exactly. Measurements should be taken at multiple points, width at the top, middle, and bottom, and height from left, center, and right. This is because frames often settle over time and may no longer be perfectly square.
When working with replacement windows, it’s essential to consider the existing frame and how the new unit will integrate with it. You’ll want to subtract about a quarter inch from the smallest measurement in each dimension to allow room for adjustments, shimming, and insulation.
Having your measurements double-checked or verified, either with a second person or a digital tool, is a wise move. A small error here can lead to a basic window that underperforms or leaks air and moisture. Being meticulous at this stage helps ensure that the installation goes smoothly and that your window functions at peak performance for years to come.
5. Removing the Old Frame
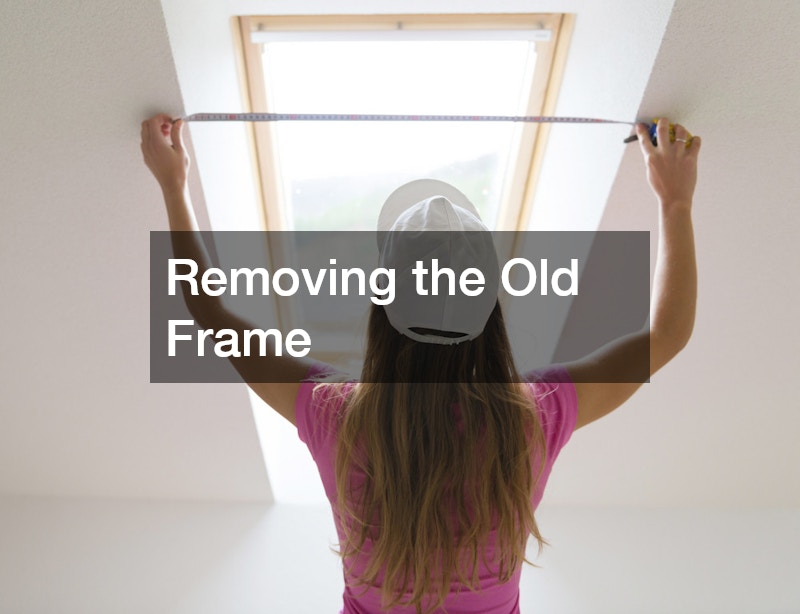
Taking out the old unit is usually where the real work begins. This step requires patience and care, as rushing can cause damage to the surrounding wall, siding, or trim. Begin by removing any interior stops and molding, and then cut through the caulking or paint that holds the frame in place. Use a pry bar or multi-tool for leverage, working around the perimeter until the frame loosens.
Unlike the professionals at window glass replacement companies, DIYers may not have specialized tools for frame extraction, so it’s important to proceed slowly and cautiously. If your existing unit is especially old, parts may be brittle or splintered. Use gloves and goggles to protect yourself from broken glass or sharp fragments. Label and organize any reusable parts, like screws or trim, that you plan to reinstall.
Once the unit is removed, inspect the opening for leftover debris, nails, or broken sealant. Clean it thoroughly and assess for any signs of damage that may have been hidden. This step prepares the space for your basic window installation and ensures a secure, airtight fit when the new unit goes in.
6. Sealing and Insulation
Even the best installation can fail without proper sealing. Air leaks, water intrusion, and heat loss can all result from poor insulation, especially in older homes or in areas exposed to the elements. Applying the right sealing methods ensures that the replacement windows not only look good but also perform as expected. This is where materials like flashing tape, backer rod, and expanding foam come into play.
Modern windows often come with detailed instructions for sealing and insulating, and it’s critical to follow them closely. Apply foam only in the recommended areas to avoid warping the frame. Use flashing tape at the sill and corners to create a water-tight barrier. Finally, finish off with exterior caulk that’s paintable and weather-resistant.
Insulation also contributes to noise reduction and comfort in your living space. Whether you’re replacing a single unit or updating several, proper sealing practices extend the lifespan of your basic window and prevent costly problems down the line. Quality sealing is just as important as the unit itself.
7. Finalizing the Fit
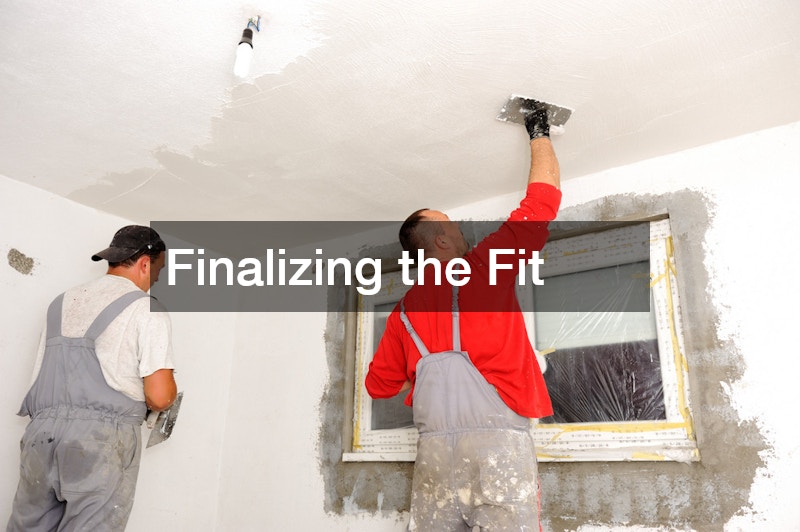
Once the new unit is in place and insulated, it’s time to finalize the installation. This involves checking for level and plumb positioning, ensuring that the sash opens and closes smoothly, and confirming there are no visible gaps or shifts. Even a small misalignment can lead to long-term wear or water damage. It’s wise to walk through this part with a checklist so nothing gets overlooked.
Professional window installers rely on a precise process for this step. Use shims to adjust the fit in small increments, and secure the unit in place with screws or fasteners provided by the manufacturer. Double-check the squareness by measuring diagonally from corner to corner. Once confirmed, you can permanently fasten and seal the window into the frame.
After the hardware is secure, you can reinstall the interior stops or apply new trim. Give everything one last inspection before calling the job complete. By following these steps, you’ll ensure your basic window is secure, energy-efficient, and properly installed, comparable in quality to a professional job without the cost.
8. Tinting for Comfort
Once your installation is complete, you might consider taking an extra step for comfort and privacy, adding film to the glass. This optional upgrade can reduce glare, minimize UV damage to furnishings, and help regulate indoor temperatures. For DIYers looking to get more out of their effort, tinting is an affordable, manageable way to improve results.
While window tinting services are available for professional application, many products on the market are designed for easy at-home use. Films come in a variety of finishes, from mirrored to frosted, and can be cut to fit your new basic window perfectly. The application typically involves cleaning the glass, spraying a soapy solution, applying the film, and smoothing out bubbles with a squeegee or card.
Tinting offers functional benefits like increased energy efficiency and improved privacy. It can be especially useful for south-facing windows that receive intense sunlight during the day. Adding this feature post-installation allows you to customize your basic window even further and tailor your home environment to your preferences.
9. Styling with Treatments
Now that your installation is complete, it’s time to put on the finishing touches. Stylish coverings not only add to the room’s décor but also provide important light and privacy control. From elegant drapes to minimalist shades, the right option can enhance both the look and functionality of your updated space.
Today’s custom window treatments are more accessible than ever, with options tailored to fit any size, style, or budget. Whether you prefer wood blinds, cellular shades, or Roman panels, there’s something that can suit your new basic window and blend seamlessly with the rest of the room. Some systems are even motorized, offering convenience at the push of a button.
Installing your treatments allows you to complete the entire project from start to finish. Take careful measurements, consider the placement of curtain rods or tracks, and choose materials that work with your room’s temperature and lighting. This final layer of customization truly personalizes your window update and adds a polished touch to your overall effort.
10. Knowing When to Call In Help
While many homeowners enjoy handling upgrades themselves, there are times when calling in professional help is the right choice. Complex installations, structural damage, or homes with unusual framing may require expertise beyond the average DIYer’s reach. Recognizing these limits can save time, money, and frustration when replacing windows.
Hiring a general contractor becomes especially important if the replacement project reveals deeper issues, like water damage, rot, or compromised framing. These professionals can assess the full scope of work and coordinate any needed repairs while ensuring your basic window installation meets code and safety standards.
Even the most enthusiastic DIYers benefit from professional consultation in tricky scenarios. Whether you need a full-home assessment or just a few hours of specialized help, knowing when to seek assistance ensures that your basic window improvements are safe, durable, and correctly integrated into your home.
Start the Project Right
Taking on a home improvement project like this can feel daunting, but with the right planning and tools, it’s entirely manageable for the handy homeowner. From choosing materials and measuring accurately to removing the old unit, sealing properly, and finishing with treatments or tints, every step plays a key role in your success.
The journey toward installing or upgrading a basic window is as much about preparation as execution. By doing your research and paying attention to detail, you can achieve results that are both functional and attractive, without relying entirely on hired help. That said, it’s also okay to admit when a task is beyond your comfort level and consult with a seasoned expert.
Whether you tackle one unit or your entire home, this DIY guide has equipped you to handle the basics with confidence. Window upgrades can transform your living space, boost energy efficiency, and add curb appeal. With your new skills and a clear understanding of the process, your next basic window replacement could be your best project yet.